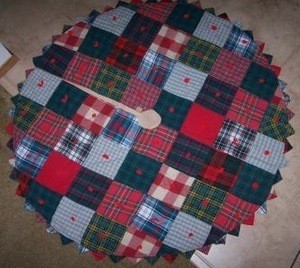
This tree skirt is made with old flannel shirts bought at the Thrift Store and made to look like the old fashioned country tied quilts.
Approximate Time: Estimated time is 5 hours.
Supplies:
- sewing machine
- sScissors
- several old flannel shirts
- yarn
- material for the backing
- several pieces of Velcro
- large tapestry needle
- chalk
Instructions:
When I made this, I actually made 4 so it is hard to estimate the time it took and the amount of flannel shirts required. I bought the shirts at the Salvation Army Thrift store. I guess you can say it is a recycled craft.
- Cut 64 squares that are 6 1/2 inches.
- Sew 8 squares together in a row. Do not put 2 of the same next to each other.
- Sew the 8 rows of 8 together forming a square piece of fabric. Matching the intersections of the corners as if you were sewing quilt squares together.
- Measure from the folded corner down the center about 22 inches. Measure starting at the folded corner again down each side 22 inches. Now draw a line with chalk from the side point to the center point to the other side point.
- Cut along this line and open. You will now have a circle. Notice that the squares at the bottom of the circle may be cut off. Save this extra flannel to make your prairie points.
- Make a slit from the exact center down to the bottom edge only on one side
- Take the back fabric and lay on top and cut the same slit in it. Cut it in a circle the same size as your tree skirt fabric
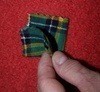
- Make enough 3 1/2 inch squares from scraps to use for the prairie points around the entire bottom. To make a prairie point, fold the square in half, then fold in half again. Now take these squares and place them side by side as you sew around the bottom edge. Remember only 1/2 of the square is going to show on the outside forming the point.

- Now lay your backing fabric on top of the front fabric with right sides together and match the slits together. Pin all the way around so it doesn't slip. The prairie points are now on the inside.
- Sew all the way around the bottom and up the slit and down the other side of the slit but leave an opening big enough to turn inside out.
- Turn inside out.
- Top stitch around the entire bottom and up the slits.
- Attach a Velcro piece at the top of the slit to hold the skirt closed around the tree trunk.
- Take the yarn with a big tapestry needle and go thru both thicknesses and tie the centers of each square so it now looks like an old tied flannel quilt.
- The prairie points can be tricky. You can make fringe on the bottom or just have it plain also.
By D. Lockwood from Millbury, OH