 Every Christmas I love to make new decorations and ornaments. And this year, I found two reindeer crafts that I had to try. They are easy to make and can be used as regular decor that you set out or ornaments for the tree. I like the traditional look, but you could also mix it up with different paint and accessory colors!
Total Time: 15 minutes to make and a couple hours for the paint to dry
Yield: 4 reindeer
Source: Pinterest
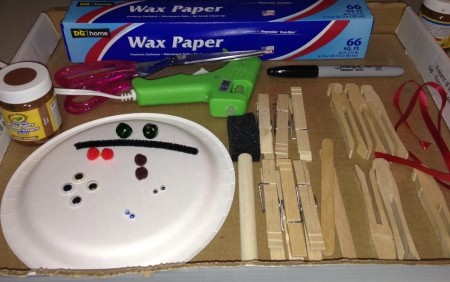
Supplies:
- 6 flat slotted wooden clothespins
- 6 regular spring clip wooden clothespins
- 2 Popsicle sticks
- glue gun
- scissors
- black or brown pipe cleaner (@ 2 inches)
- 4 small pom poms (at least one red)
- 4 sets of small wiggle eyes
- 1 black permanent marker
- brown craft paint
- 1 paint brush
- wax paper
- bells (optional)
- ribbon (optional)
Steps:
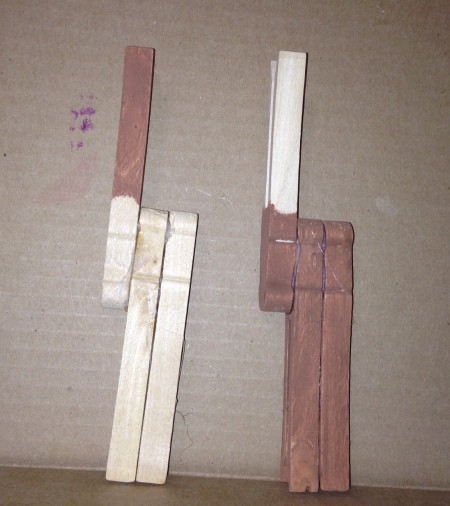
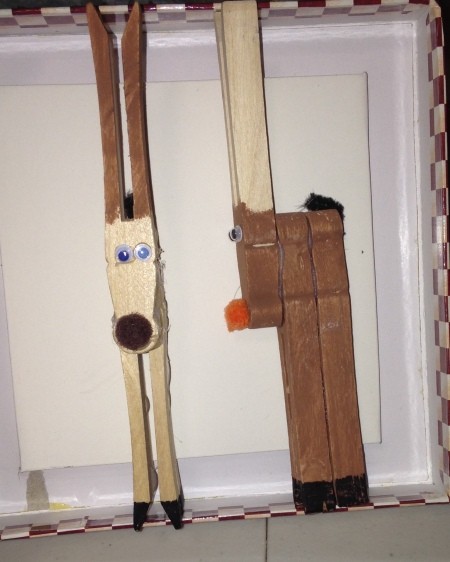
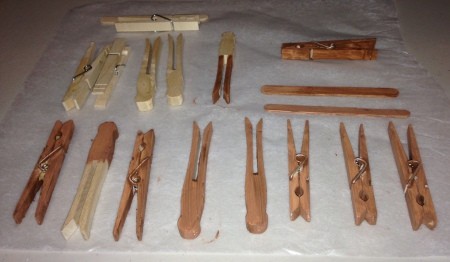
- Paint the clothespins brown and let dry on wax paper. You can leave some unpainted if you want light colored reindeer. Or you can mix it up and only paint parts of the clothespins, like the ears.
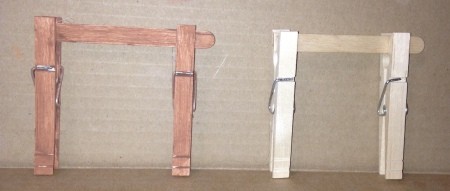
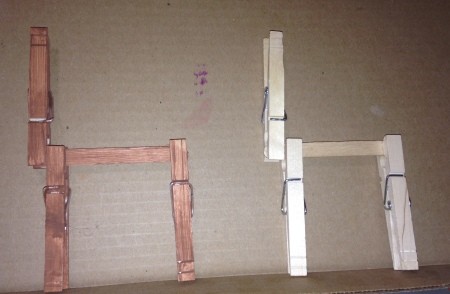
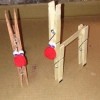
- For the reindeer table decorations, use the regular clothespins. Cut about an inch off one end of each Popsicle stick. Hot glue a clothespin to each end of the stick, leaving room at one end for the third clothespin. The easiest way to glue these is to put small dots of glue on either side of the stick. Then open up the two clothespins over the glue. Turn the third clothespin right side up and hot glue it in the space you left available.
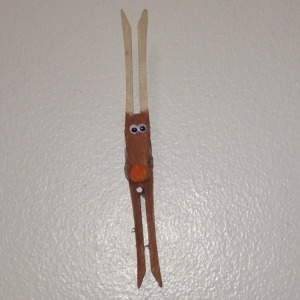
- Then, take a black permanent marker and color the bottom of the 'leg' clothespins. This will be the hooves. Finally, hot glue a pom pom nose and wiggle eyes to the 'head' clothespin.

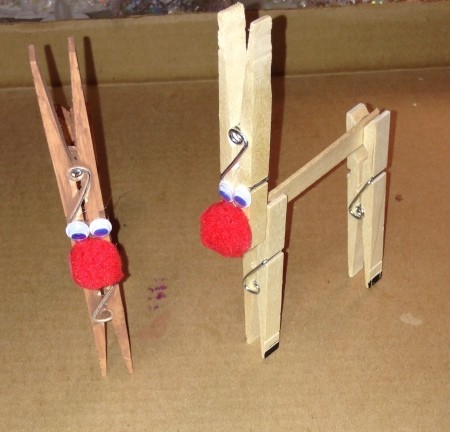
- For the reindeer ornaments, glue two flat slotted clothespins together, back to back. These will be the body and legs. Then turn the third clothespin upside down and glue it above the slot of the other clothespins.
- Then, use the permanent marker to add hooves on the 'legs'. And hot glue wiggle eyes and a pom pom nose on the 'head'. Also hot glue the pipe cleaner tail. You could also tie a ribbon around the neck, below the head clothespin and add a bell. And hang your reindeer on the tree by simply sliding them over the branches, like you do on the clothesline. Since I didn't put up a tree this year, I hung my reindeer on the wall with little nails, which you can see in the main photo.
Add your voice! Click below to comment. ThriftyFun is powered by your wisdom!