Make this fun Christmas card for a special friend, and let him start dreaming of a white Christmas.
Approximate Time: 30 minutes
Advertisement
Supplies:
5.6 inches x 8.2 inches red cardboard
green cardboard
5.3 inches x 3.6 inches brown riffled cardboard
a few sheets of ordinary white printer paper
small wooden Christmas ornament (approximate size 1 inch x 1 inch)
2/8-inch wide red, silver edged, organza ribbon
one clear plastic bag
pencil
ruler
pair of standard scissors
pair of pattern edged scissors
standard paper punch
clear Sellotape
quick-drying glue
Instructions:
Fold the red cardboard in half to create a card sized 5.6 inches x 4.1 inches ~ use the ruler to make the fold neat and smooth.
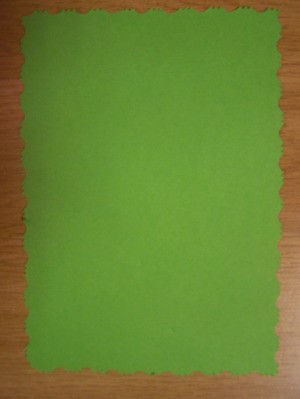
Use the pair of pattern edged scissors to cut a piece of green cardboard sized 5.5 inches x 4.0 inches.
Advertisement
Glue the green cardboard to the front of the card, carefully ensuring that it is an equal distance from the edges.
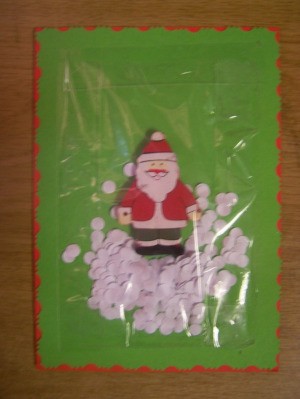
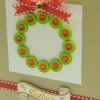
Now glue the Christmas ornament to the front of the card, carefully ensuring that it is an equal distance from the edges.
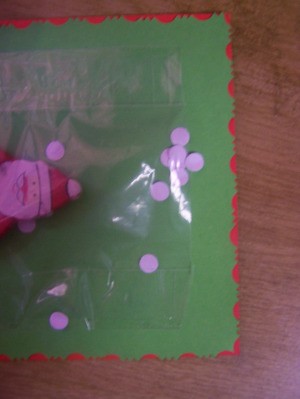
From the plastic bag, cut a piece sized 4.5 inches x 3.1 inches.
Use the sellotape to stick the plastic bag in place over the Christmas ornament, again ensuring that it is an equal distance from the edges. Only stick three sides with the sellotape ~ leave the top side open, so that you can add the "snowflakes."
Advertisement
Use the standard punch to punch the white printer paper ~ the circles that you have punched, will be the "snowflakes." The more circles you punch, the more snowflakes you will have.
Add the snowflakes to the piece of bag that you have placed over the ornament and use the sellotape to seal the top side of the bag.
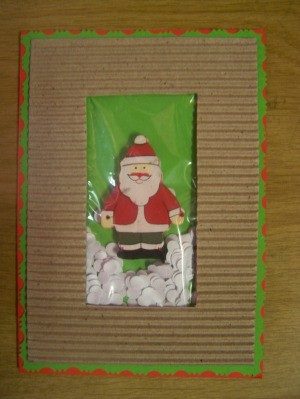
Take the piece of brown riffled cardboard. Cut out the inside, leaving a space of 1 inch from the outer edges of this piece to make a "frame."
Advertisement
Glue the frame to the front of the card, carefully ensuring that it is an equal distance from the edges.
Make a small bow with the ribbon and glue it in position in the top right corner.
Cut a piece of white printer paper that can be glued to the inside of the card, where you can write a message.
Photos included:
Photo 1: Use the pair of pattern edged scissors to cut a piece of green cardboard.
Photo 2: Glue the Christmas ornament to the front of the card.
Photo 3: Use the sellotape to stick the plastic bag in place over the Christmas ornament.
Photo 4: Add the snowflakes to the bag that you have placed over the ornament.
Photo 5: Use the sellotape to seal the top side of the bag.
Photo 6: Glue the frame to the front of the card.
Advertisement
Photo 7: Make a small bow with the ribbon and glue it in position in the top right corner.