Approximate Time: About one hour to assemble. This does not include drying time for frost paint, or baking time for clay mittens.
Wash and dry outside of glass block. (I also wipe the block with rubbing alcohol to remove oils, etc.)
When block is clean and dry, use a strip of masking tape to cover the plastic "plug". Place plug in hole of glass block. This will prevent the frosting from getting inside the block or on the plastic plug.
Follow instructions on can to spray one or two coats of "frosting" over the top and sides of the glass block. Do not paint the bottom of the block. Allow to dry.
Insert the string of bulbs into the glass block, arranging them loosely, leaving plug end hang out of the hole.
Place strands of the metallic shred inside the glass block to cover the bulb wire.
Remove masking tape from plastic plug. If necessary, use a knife or box-cutter to cut a slit in the round plug to allow you to put the plug end of the lights through. Place plastic plug in hole and pull light plug and long end of wire through.
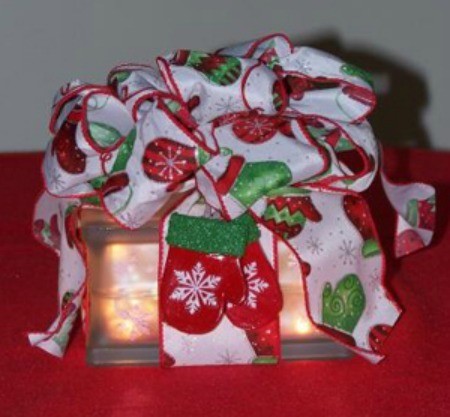
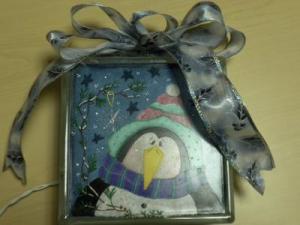
Cut a piece of mitten ribbon approximately one-and-a-half yards long (for the smaller block). Tie the ribbon around the block like a package, leaving 6 inch-7 inch tails on top.
Make a 10-12 loop bow with center loop and graduating sized loops. Secure with floral wire, leaving enough wire to attach to bow on block. Leave 6 - 7 inch tails.
Wire bow to ribbon on top of block. Smooth out and arrange the loops. Determine desired length of ribbon "tails" and cut ends at an angle.
Cut around edges of rub-on snowflake transfers and follow package instructions to place snowflakes around sides and top of glass block, arranging them in clusters of varying sizes.
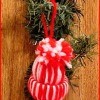
Make a paper pattern for a mitten approximately 2 1/2 inches long and 1 1/2 inches wide.
Knead red clay to form a workable ball. Use clay roller or drinking glass to flatten to a quarter inch thick.
Place pattern on clay sheet and cut out mitten with knife, clay cutter or box cutter. Smooth edges.
Turn pattern over and repeat to make the second mitten.
Cut 2 small paper clips to make loops for hangers. Press the hangers into the back of each mitten, covering with a small piece of clay and bending the wire up a little so you can put the ribbon through later. (You could also just hot glue the ribbon to the mittens later.)
Roll out a small chunk of green polymer clay and flatten. Cut 2 rectangles to fit at the cuffs of each mitten. Press onto mittens. Use a toothpick to roughen the green clay to resemble fur. Place mittens on foil and make sure they are flat. Bake according to package instructions.
When mittens are hard and cool, brush with a coat of polymer glaze. When glaze is dry, place a snowflake sticker on top of each mitten. Put silver ribbon through the wire loops to join the mittens. Tie ends of ribbon together. Attach silver ribbon to larger ribbon, underneath the bow, allowing the mittens to hang over one side.
Add your voice! Click below to comment. ThriftyFun is powered by your wisdom!
Very nice job! I have also done some painted glass blocks. I just don't have all my ribbons done yet.
Add your voice! Click below to comment. ThriftyFun is powered by your wisdom!