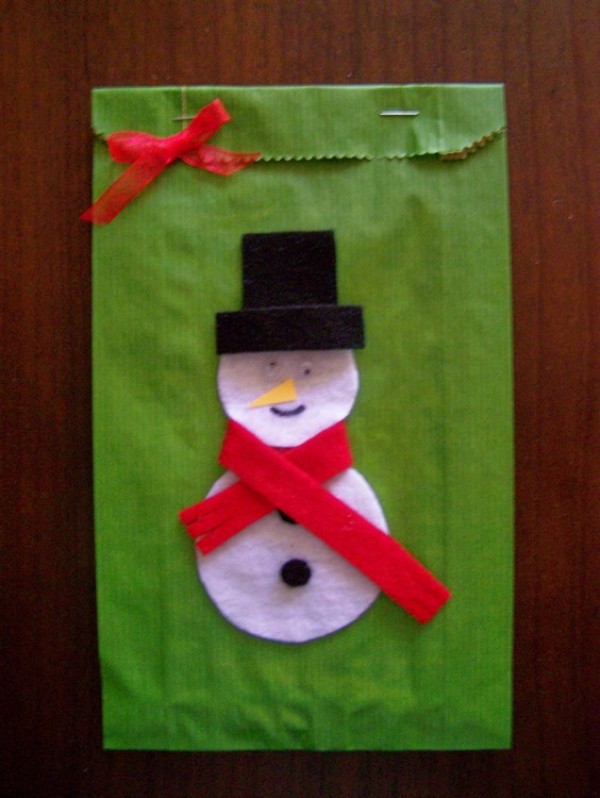
Make this cute gift bag in a jiffy. Fill it with a stocking filler or candies, and you are ready to spread some Christmas cheer!
Approximate Time: 20 minutes
Supplies:
- green gourmet paper bag
- small pieces of felt in the following three colors: white, black, and red
- left-over piece of yellow cardboard
- 1 pair of small wiggle eyes
- pencil
- ruler
- pair of compasses
- pair of standard scissors
- quick-drying glue
- Artline 750 laundry marker
- stocking filler or candies
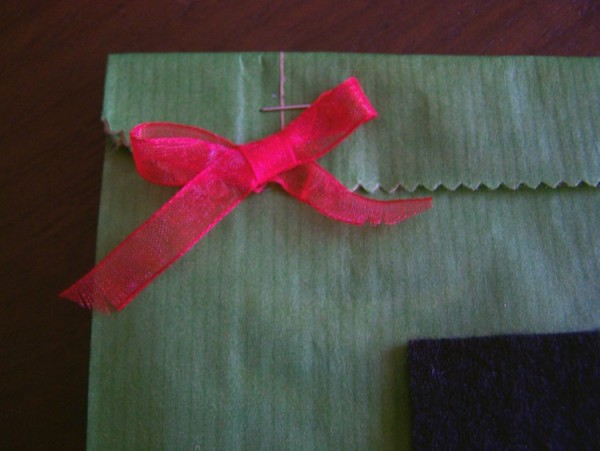
- optional: a stapler and a leftover piece of organza ribbon
Instructions:

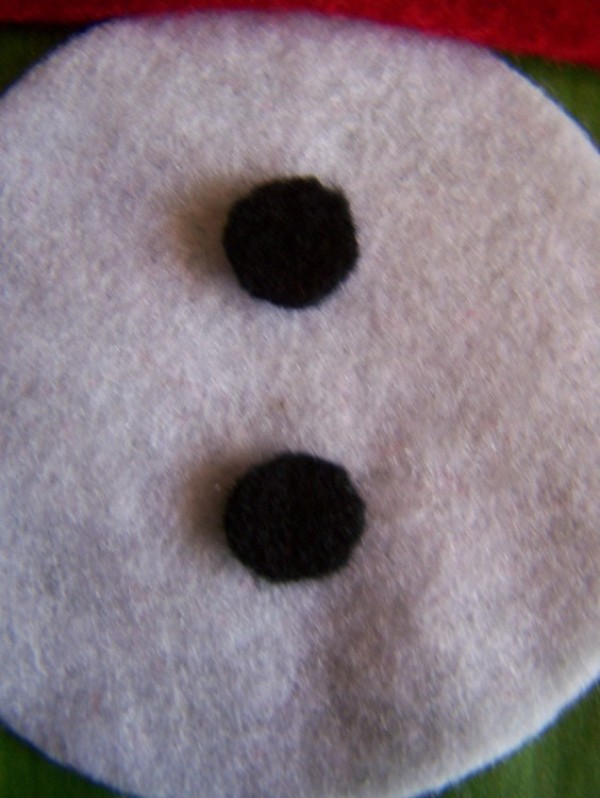
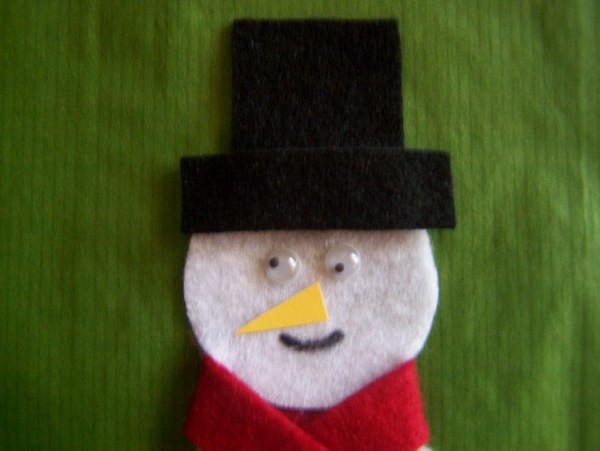
- Use the pair of compasses and the pencil, and draw two circles on the white felt: The first circle must have a diameter of 2.3 inches, this will be the snowman's body.
- The second circle must have a diameter of 1.5 inches, this will be the snowman's head.
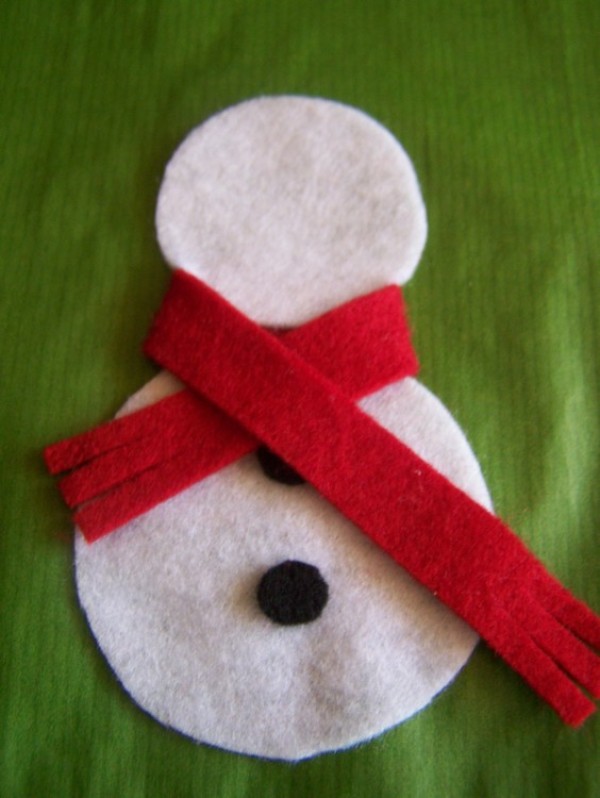
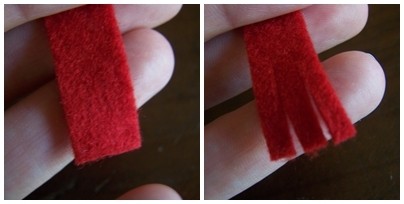
- From the red felt, cut a strip 0.4 x 7 inch, this will form the snowman's scarf. At both ends of the strip of red felt, make small incisions, so that it will look as if the scarf has fringes.
- From the black felt, cut the following:
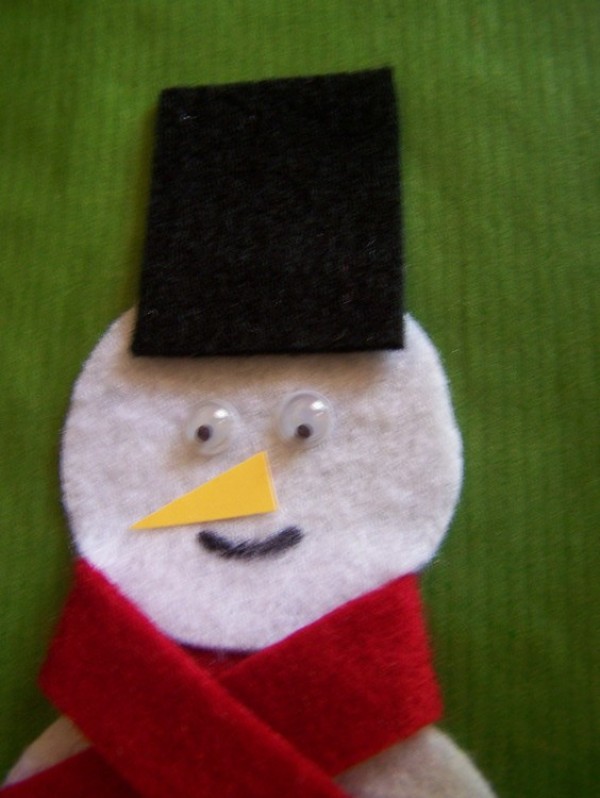
- a rectangle sized 1.1 x 1.3 inches
This will be the top part of the hat.
- a rectangle sized 0.4 x 1.6 inches
This will be the rim of the hat.
- two small circles
You will use these for the buttons.
- Glue the bigger white circle in position on the paper bag.

- Add a little bit of glue above the snowman's body and put the scarf in position, but do not fold the scarf over the snowman's body yet.
- Glue the snowman's head in position.
- Add the two buttons.
- Add some glue to the ends of the scarf and fold the ends of the scarf over the snowman's body.
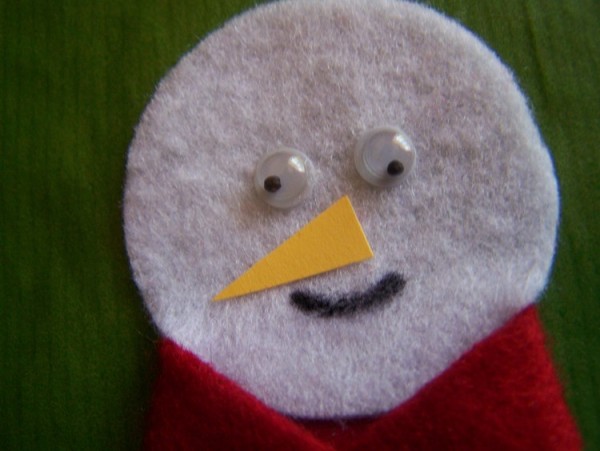
- Glue the wiggle eyes in position.
- Cut a small triangle from the yellow cardboard and glue the "nose" in position.
- Draw a mouth with the laundry marker.
- Glue the top part of the hat and the hat's rim in position.
- Add the stocking filler, I used a small magnetic photo frame and fold the top of the bag over and staple it to close it.
- Make a small bow with the ribbon and glue it in position in the top left corner.
By Benetta from Pretoria, Gauteng.