Create unique Christmas tree ornaments using metal lids with pull-tabs!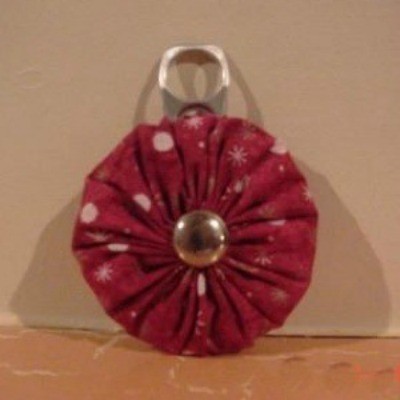
Approximate Time: 20-30 minutes or less
Supplies:
- fabric
- thread
- button, ric-rac, or other embellishment
- metal lid with pull-tab
- batting
- needle
- glue
Instructions:
- Wash and dry the metal lid with pull-tab. Be careful not to cut yourself on any sharp edges.
- Cut a fabric circle approximately 4 inches larger in diameter than the lid size. In my sample, the lid had a diameter of 3 inches. I cut a fabric circle with a 7 inch diameter.
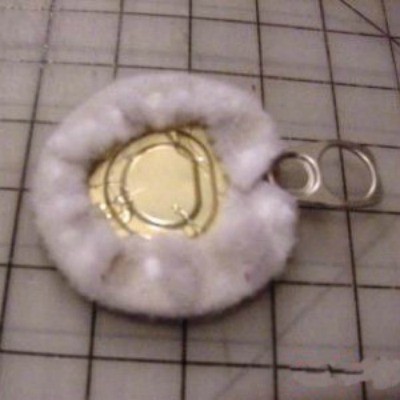
- Cut a circle from quilt batting approximately 1 inch wider in diameter than the metal lid. Place the lid on top of the batting as shown and mark the location of the pull-tab. Cut the batting on the marked lines and remove this small piece. Next, place the lid back on the top of the batting and glue the batting onto the lid. The batting edges should wrap around the edges of the lid. Unless you have lots of time to wait for the glue to dry, you might want to use hot glue which dries almost instantly.
- Thread a needle with a long length of thread and knot the ends. Place a running stitch around the outer edge of the fabric. (When making the fabric "yo yo." Some people turn the raw edges of the fabric to the wrong side of the fabric as they stitch; others simply do a running stitch leaving the edge flat and the raw edge exposed.)
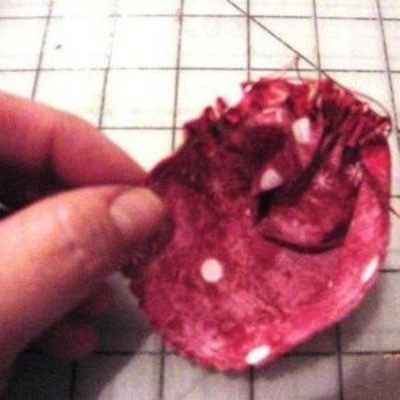
- Once you've stitched all the way around the circle, insert the metal lid. It will be necessary to cut a slit in the fabric to allow the tab to poke through. On the sample ornament, I made a slit 1 1/4 inch in from the edge of the fabric and wide enough to allow the tab to pass through. Be sure to place the batting- covered side of the lid up so that the batting is facing you. Once the lid is safely positioned inside the fabric circle, pull the thread taut and secure with 2-3 whip stitches. (There are many online sites which can explain in detail exactly how to sew a yo yo in case my directions are unclear.) Click here: Making Fabric Yo Yos
- The last thing to do is hot glue a button on the front of the ornament. Simply position it over the hole of the yoyo. You could also glue ric-rac around the ornament edges or decorate the fabric with dots of glitter. The exposed pull-tab can be painted or wrapped with yarn if you do not care for the bare metal look.
Use your imagination to create truly unique ornaments that can adorn your tree for years to come. These cute ornaments can also be placed on presents.
By Pam from McMinnville, TN